Showing posts with label cooking. Show all posts

Saturday, December 12, 2015

Baby R: 27-30 Weeks: Entering 3rd Tri!

This year is just flying by! I can't believe we've passed Thanksgiving and Christmas is quickly approaching! I'm feeling oddly calm about the holidays this year. I've gotten 90% of our gift shopping down and our house was decorated earlier than usual. Maybe all my stress is being directed towards the upcoming arrival of the baby.

Thanksgiving!

Getting our Christmas tree. This is me "supervising." ;)

In honor of our new house, we wanted to get a big tree. One where when we put it in the car, we had a moment of "maybe it's TOO big..." Goal achieved! This is the tree with no stand. We had to trim a good chunk off the top to get it to fit. Haha.

How far along? 27-30 Weeks

Total weight gain: 14 lbs

Exercise: Mixing in prenatal yoga and the elliptical. I recently got a FitBit and it's been interesting to see my heart rate. Sometimes when I'm sitting down, my heart rate is 100- and the FitBit thinks I'm in the "fat burn" zone! Huge change from my pre-pregnancy heart rate of the low 60s! 


Stretch marks: None yet, but I expect them any day now.

Maternity clothes: All the time!

Belly button in or out? Still in. 

Wedding rings on or off? They still fit, but are getting more snug.

Sleep: It's going ok, but I still have a hard time getting comfortable. I'm also getting breathless when laying down.

Any baby purchases or preparations? We finally painted the nursery! Still only have a dresser, but at least it's progress!


Food cravings: Thanksgiving dinner! And I've gotten to eat a lot of it!

Symptoms: Starting to get more tired. I think the second trimester energy is fading. 

Movement: Baby must be running out of space. He's doing less kicks and starting to have bigger motions. I can also feel him stretching out in there. 

Best moment this week: We hosted our annual holiday dinner party! We didn't get to have one last year due to a tiny apartment, so I couldn't pass up the opportunity with the new house. 
Even if I couldn't enjoy the wine, at least I got a good laugh out of the napkins!

I spent the day cooking up a storm! We had ham, turkey, stuffing, mashed potatoes, gravy, yams, and brussels sprouts. I think I over did the work load because my toes started to swell right before dinner. After that, I put my feet up for the rest of the night!

Rocky road brownies. SO GOOD! Just a boxed brownie mix with added walnuts. Then after baking and the brownies are still hot, top with marshmallows, chocolate chips, and more walnuts.


And of course, the baby bump got lots of love and attention. :)


Friday, October 23, 2015

Foodie Friday: Fresh Fruit Tart


My favorite dessert by far is a fresh fruit tart. Don't get me wrong, there are days when nothing will satisfy quite like a slice of decadent chocolate cake, but I am always drawn to a delicious fresh fruit tart. From the flaky crust to the creamy pasty filling to the sweetness of the fruit, it's truly a dessert that has it all. And it has fruit- must be healthy, right? ;)

I've always been intimidated to make a fruit tart- you have to make pastry cream! As I enter my 6 month of pregnancy (and the pregnancy cravings that come with it), I haven't gotten bit by the nesting bug yet, but all I seem to want to do is bake! I seized the opportunity and went for it. Surprisingly, it was not as difficult as I thought! It takes time, but the end result is well worth it!

Fresh Fruit Tart
adapted from Ina Garten's recipe

Ingredients

Pastry Cream
- 3 large egg yolks
- 6 tbsp sugar
- 1 3/4 tbsp cornstarch
- 1 cup milk
- 1 tbsp butter, melted
- 1 tsp vanilla
- 1 tbsp heavy cream

Crust
- 1 1/4 cups flour (plus extra for rolling the crust)
- 3 tbsp sugar
- 1/2 tsp salt
- 8 tbsp (one stick) cold butter
- 3-4 tbsp ice water

Toppings
I used strawberries, raspberries, and kiwis. I would also throw in blueberries and peaches. Be sure to slice your fruit (except raspberries and blueberries) so they're easier to arrange. You can go for a patterned look like I did or group fruits in a more casual arrangement. 

You'll also need a tart pan (one where the bottom piece can be removed from the ruffly edge piece. Also needed are a piece of foil and dried beans or rice for baking the crust. 


Directions 

Pastry Cream
1. In a mixer w/ a paddle attachment, beat egg yolks and sugar on med-high for about 3 mins or until yolks are a pale yellow. On low, beat in the cornstarch. 
2. In a sauce pan, bring milk to a simmer. Slowly pour the warm milk into the egg mixture, whisking steadily on low.
3. Pour back into the sauce pan and cook over medium heat until mixture is thick. Bring to a boil, then cook on low for another 2-3 minutes.
4. Remove from heat and mix in butter, vanilla, and cream.
5. Pour into a bowl and cover with plastic wrap. Place plastic directly over the pastry cream so it does not form a film when cooling. Place in fridge until cold. It'll thicken up as it cools. 

Beating the eggs & sugar. 

Slowly adding the milk. Pour slowly as to not cook the eggs.

Cooking the pastry cream mix.

It turns more yellow as it thickens.


Crust
1. Combine flour, sugar, and salt in a bowl. Cut cold butter into small chunks and add to flour mix. Using a pastry cutter, cut in butter until well combined (only small pieces should remain). You can also do this in a food processor by pulsing ~10 times. 
2. Add ice water and mix until a dough comes together. Form dough into a disk, cover with plastic wrap, and refrigerate for 30 mins. 
3. Preheat oven to 375 degrees.
4. Removed dough from fridge and let sit for 5 mins. On a well floured surface, roll out dough until it is big enough to fit your tart tin with a little hanging over the edges. Place dough in tin and cut off excess.
5. Line crust with foil and fill with dried beans or rice. Bake for 10 mins. Remove beans and foil, prick crust with a fork, and bake for another 15-20 mins. Allow to cool completely.


I use a pastry cutter for crusts. Keep going until the flour is all incorporated.

Form into a disk, wrap with plastic wrap, and refrigerate for 30 mins. Remove and let sit for 5 mins before rolling.

You'll need a tart tin with a removable base so you can pop the crust out.


Toppings
Prepare your fruit by washing and slicing. 

Assembling the tart! 
Place tart crust on your serving plate (I don't have a plate big enough, so I just placed the crust on the round metal piece directly on the plate). Spread pastry cream over the inside of the crust. Place fruit on top either clustered together or in a pattern. 


All my ingredients ready to be assembled.

Spread the pastry cream on the crust.

Arrange the fruit and take a picture!

Enjoy!


Friday, August 7, 2015

The Best Layered Taco Dip (Seriously)

Layered Taco Dip

I'm sure you've tasted or at least seen some kind of layered dip, but this one takes the cake. It's got extra ingredients for more flavor!
Any time there's a potluck or I host a party, I make this. It's always the first to go and people rave about it the entire time. This kind of tastiness needs to be shared. I hope you enjoy my signature dish!


Ingredients
- 1 can (10 oz) refried beans
- 1 small can diced jalapeños
- 1 box Avo Guacamole 
- 1 cup (8 oz) sour cream 
- 1 cup mayo
- 1 pkg taco seasoning 
- 1 small can (3 oz) chopped olives
- 1 small can diced chili peppers
- 6 Roma tomatoes, diced and pat dry on paper towels
- 1 bag finely shredded cheese (Mexican blend)
- tortilla chips for dipping!

- 9x13 inch dish

** You can use reduced fat alternatives (mayo, sour cream, refried beans); it'll still taste amazing!


To prep your layers- drain liquid out of cans (jalapeños, chilies, olives). If more than one ingredient in the layer, mix together before spreading.

Layers in order of going into dish (bottom to top)
Layer 1: refried beans & jalapeños
Layer 2: guacamole
Layer 3: sour cream, mayo, chilies, olives, taco seasoning
Layer 4: diced tomatoes
Layer 5: shredded cheese


Friday, August 29, 2014

Foodie Friday: Thai Crunch Salad

Thai Crunch Salad

Have you ever been to California Pizza Kitchen? Ever tried their salads? They have one of my all time favorites. Even better that you can get it all over the country! (If you're going to Disneyland by way of SNA/John Wayne Orange County airport, they have one in the airport.) I've been craving a good salad, so I went on the hunt for a copycat recipe. Supposedly this is the official one from the cookbook you can buy at their restaurants.

The salad has crisp cabbage with vegetables, peanuts, and crispy wontons and rice sticks. It's tossed in a lime-cilantro dressing and drizzled with a Thai peanut sauce. At CPK, you can get it with/without avocado and chicken. 

The recipe has 3 parts to it- the lime-cilantro dressing, the peanut dressing, and the salad components. I made the dressings first, then let them chill in the fridge while I chopped the salad.

Lime Cilantro Dressing (makes 1 cup)

1/4 small red bell pepper, cored and cut into 1/2-inch pieces
1 small bunch cilantro leaves, coarsely chopped
1 tablespoon + 2 teaspoons honey
1 tablespoon + 2 teaspoons white vinegar [I used rice vinegar because it's what I had]
1 tablespoon + 1 1/2 teaspoons lime juice
1 1/2 teaspoons light corn syrup [I didn't have this, so I omitted it]
2 teaspoons Dijon mustard
1/2 teaspoon Asian sesame oil
1/4 teaspoon minced fresh ginger
1/2 teaspoon kosher salt
1/4 ground black pepper
1/2 cup extra-virgin olive oil 

Place bell pepper and cilantro leaves in the work bowl of a food processor, then add remaining ingredients except for olive oil. Process until smooth, 30 to 60 seconds. 
With food processor on, add olive oil in a thin stream and continue processing for 1 minute after all the oil has been added; there should be no oil on the surface. Store covered in refrigerator for up to 1 week (whisk before using). 

It's a lot of ingredients, but well worth the effort.

In the food processor- super easy way to make homemade dressing!


Thai Peanut Dressing (makes ½ a cup)

2 tablespoons creamy peanut butter
1 tablespoon seasoned rice vinegar
1 tablespoon honey
1 1/2 teaspoons water
1 1/2 teaspoons soy sauce
1 tablespoon sugar
3/4 teaspoon kosher salt
1/4 teaspoon (scant) cayenne pepper [I used ground ancho chili pepper, wasn't as spicy]
Pinch of crushed red pepper flakes
1 tablespoon canola oil [omitted due to preferred consistency]

Whisk together peanut butter, vinegar, honey, water and soy sauce. Stir in sugar, salt, cayenne and red pepper flakes. Add oil and continue whisking until smooth. Use immediately or refrigerate for up to five days. Bring to room temperature and whisk before using. 

Easily whisked together. I used crunchy peanut butter. :)


Thai Crunch Salad
 (serves 4)

1 head Napa cabbage, cut into 1/4-inch strips
1 small head red cabbage, cored and chopped
2 large carrots, peeled and julienned
2 bunches scallions (green onions), thinly sliced (white and pale green parts only)
1 large English (hothouse) cucumber, peeled, cored and julienned
1 large bunch cilantro, chopped
2 cups cooked shelled edamame (soybeans)

*Note: I used regular cabbage and romaine lettuce because it's what I had on hand. I recommend using napa cabbage and you can add in romaine or iceberg lettuce. I also used a pre-cut stir fry bag of broccoli, carrots, and snow peas. I used a regular cucumber, and forgot to add the extra cilantro and edamame. I also included the rest of the red bell pepper from the lime cilantro dressing.

2 cups roasted peanuts
4 cups fried wonton strips, found near the salad dressings/croutons
2 cups crisp rice sticks [omitted because I didn't have time to fry them]
2 ripe Hass avocados, peeled, pitted, cut into 1/2-inch dice [optional, but I always include!]
1/2 cup Thai peanut dressing
1 cup lime-cilantro dressing

Place cabbages, carrots, scallions, cucumber, cilantro, edamame and peanuts in very large mixing bowl and toss to mix. 
Pour lime-cilantro dressing into bowl and toss to mix thoroughly. Gently toss in fried wonton strips. Divide salad among four, very large, chilled serving plates and top with crisp rice sticks. 
Sprinkle crisp rice sticks over top of each salad, then use a squeeze bottle or syrup dispenser to drizzle Thai peanut dressing over rice sticks. 
If serving the salads with avocado, distribute over the salads. Serve immediately.

*Note: you don't have to put the salad together in this order. I threw the veggies in a bowl, poured the dressings on it (less of the peanut one) and added my toppings. 


Chopped salad components. You can really tweak this to any kind of veggies you enjoy.


Thai Crunch Salad!

It was a very tasty salad, and one I'll definitely be making again- with the ingredients that I forgot to add. The lime cilantro dressing was pretty thin (probably the lack of corn syrup) and the peanut one lacked any spice (probably because I didn't have the right pepper). I'd still eat it the way I made it, but I'd be even more delicious with the correct ingredients.

Do you have a favorite copycat recipe from a restaurant?

Friday, February 21, 2014

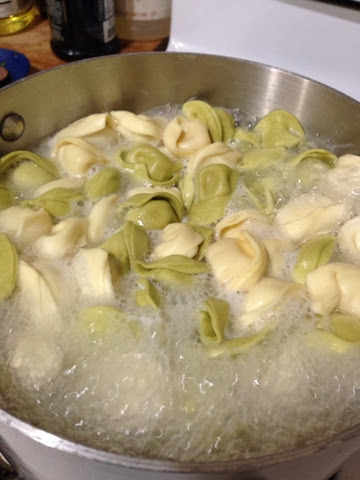
Foodie Friday: Easy Tomato Cream Tortellini

I love pasta, especially when it comes in the form of ravioli or tortellini in some sort of cream sauce. All that running means I have to replenish those calories somehow, right? ;) This is a quick and easy tortellini dish in a creamy tomato sauce with spinach. Perfect for a busy weekday night.

Easy Tomato Cream Tortellini

one 16oz bag of Barilla Tortellini (in the refrigerated section)
2 cloves of garlic, minced
2 cups fresh spinach, chopped
one 14 oz can diced tomatoes
1 1/2 tsp dried basil
1/4 tsp onion powder
3 tbsp flour
3/4 cup whole mile
3/4 cup heavy cream
1/4 cup parmesan, grated
salt & pepper


Boil a pot of water and begin to cook your tortellini according to the package.

Heat oil in a pan over medium heat. Add the garlic and saute until fragrant being careful not to burn it.

Add the diced tomatoes, spinach, dried basil, and onion powder. Season with salt and pepper. Cook over medium heat until the mixture begins to bubble.


In a bowl, combine milk and cream. Whisk in the flour. Add to the bubbly spinach and tomato mix.


Bring to a low boil, reduce the heat, and simmer until the sauce thickens. Add the parmesan after ~5 minutes. Stir to melt and combine it.

When the sauce is to the consistency of your liking, add the tortellini and stir until incorporated.


Serve and enjoy!

Friday, January 3, 2014

Foodie Friday: Zuppa Toscana


Zuppa Toscana


I used to work at a popular Italian chain restaurant famous for their breadsticks. One of their other big hits was a thin creamy, yet spicy soup with kale, sausage, and potatoes. This recipe comes pretty close to the restaurant, but this version is a lot spicier. It could also just be the sausage I got. Still very yummy!


4 slices of bacon, cut into small pieces
1 lb spicy Italian sausage (ground or removed from casings)
1 large yellow onion, diced
4 cloves of garlic, minced
5 cups chicken broth
3 cups Russet Potatoes, cubed (I leave the skin on.)
4 cups of kale, in bite size pieces
1 cup heavy cream

parmesan cheese, grated
crusty french bread


Directions

In a large soup pot, cook the bacon pieces over medium until crispy. Add the sausage. Using a utensil, break the sausage into small pieces. 

Once the sausage is browned and crumbled, drain off the grease, leaving a tablespoon or two to saute the onion. Push the sausage to the edges of the pot and add the onion to the center. Saute until translucent, then add garlic and saute until fragrant. 

Stir in the broth and potatoes. Season with a bit of salt and pepper. Simmer for about 15 minutes or until the potatoes are tender. 

Add the kale and cream. Simmer for 5 minutes. Turn off the heat and cover for 10 minutes. Season with more salt and pepper if needed.

Serve with grated parmesan and bread. Enjoy!

Friday, June 21, 2013

Foodie Friday: Boysenberry Pie

Welcome to my first Foodie Friday post! Thank you to Jen at Hello Fitness... We Meet Again for the inspiration! :) I wont lie, I definitely enjoy food. Eating it especially. One of my best stress relievers is baking. 

Dearest's favorite kind of pie is boysenberry pie. Boysenberries are pretty hard to find though. I haven't been able to find them frozen and have only been able to find them fresh at a one place. There's a pick-your-self ranch about 30 minutes south of us that offers boysenberries and for the past couple years, Dearest and I have picked berries and made pies. The season only lasts 3-4 weeks, so we make it a point to go when it starts. This past weekend, one of my good friends came to visit and we took her on her first berry picking adventure. 
It was a gorgeous day! 

We started hopping rows to find better berries. 

Dearest and my friend comparing the quality of berries.

We took home our goods and got ready to turn them into pies! It was about $13 for 6 pounds of berries. 


Here's my Boysenberry Pie Recipe: 

Crust 
(makes about 10 cupcake sized pies or one 9" pie)
1 cup Crisco shortening
2 & 1/2 cups flour
1/4 cup sugar
1 tsp salt
1 cup cold water

-mix flour, sugar and salt. 
-use a pastry cutter to mix in the shortening until crumbly
-mix with a fork and add just enough water until the dough sticks together and forms a ball
-roll out the dough
Cut the circles about twice as wide as the cupcake openings and line with the pie crust.

Cut circles for the tops or plenty of shapes to act as tops. 

Boysenberry Pie Filling
(for a 9" pie)
5 cups of fresh boysenberries, washed and patted dry 
1/2 cup - 3/4 cup sugar
1 tsp lemon juice
pinch of nutmeg
3 tbsp quick cooking instant tapioca
pie dough: enough for bottom and top crusts

-preheat oven to 400 degrees
-wash and pat dry the fresh berries
-mix berries with sugar, lemon juice, nutmeg and tapioca
-let sit for 30 minutes
-pour into uncooked pie crust, top with crust and pinch edges to seal
-cut slits in top crust for ventilation
-bake for 15-17 minutes until edges are golden brown for mini pies (for a 9" pie, bake 30 mins, then lightly cover top crust with foil and bake another 20 mins)

Wash and pat dry berries.

Mix ingredients and let sit for 30 mins. 

Fill mini pies with berry filling.

Get creative with your tops! 

Don't forget to leave steam vents for baking. 

Bake mini pies for 15-17 minutes. Allow pies to cool (about 15 minutes). 
Twist pies a bit to free them from the muffin tin. You should be able to pull them out easily. 

Voila! Mini pies!

I bake a lot of them and pop them in the freezer for easy to heat desserts later on. 

Monday, May 13, 2013

Cheddar Bay Biscuits

If you've ever eaten at Red Lobster, you probably remember their delicious cheddar biscuits. While I'm not a huge fan of the food at Red Lobster, I'm always up for eating there for the biscuits. I found a copy cat recipe that's super close and quite tasty. 


Cheddar Bay Biscuits
(makes about a dozen small biscuits)

Ingredients
2 cups all purpose flour
2 tsp baking powder
1/2 tsp baking soda
1 tsp sugar
3/4 tsp salt
1/2 tsp garlic powder
1/4 tsp cayenne pepper powder
4 oz cheddar cheese, shredded
1 cup buttermilk
1/3 cup of butter, melted and cooled for a few minutes

Topping
2 tbsp butter, melted
1/4 tsp garlic powder
2 tsp fresh parsley, minced

Directions
Preheat oven to 475 degrees. Line a baking sheet with parchment paper.

In a large bowl, mix the flour, baking powder, baking soda, sugar, salt, garlic powder and cayenne. Stir in the shredded cheddar. 
In another bowl, measure out the buttermilk. Slowly pour in the butter while mixing until small clumps form. 
Pour the buttermilk mixture into the dry ingredients and stir just until everything is wet. 
Use two spoons to drop biscuits about half the size of an ice cream scoop. 

Bake for 12 minutes or just until golden. 

While the biscuits are in the oven, mix the topping ingredients together. 
Immediately brush the biscuits after they come out of the oven. Don't over do the brushing! 
Cool for a few minutes and enjoy! 
:)